1
/
of
6
NDT Sales Australia
Ultrasonic Flaw Detector - Trusonic II
Ultrasonic Flaw Detector - Trusonic II
Regular price
$4,950.00
Regular price
Sale price
$4,950.00
Unit price
/
per
Shipping calculated at checkout.
Couldn't load pickup availability
Ultrasonic Flaw Detector - Trusonic II
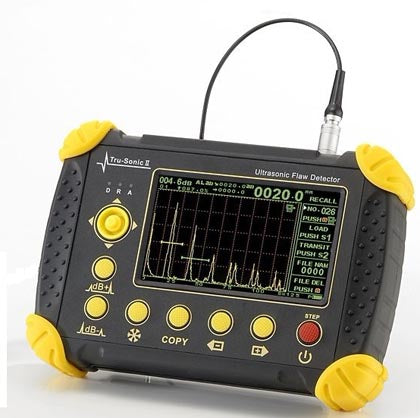
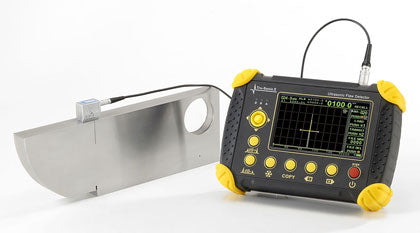
TruSonic II hand held and light weight Digital Ultrasonic Flaw Detector offers you all the features of larger, heavier instruments, such as high resolution with the usual high gain reserve.
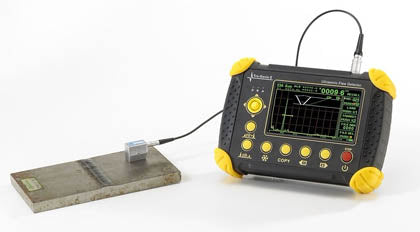
In addition to this, the instruments ease work by the inclusion of extras. For example in weld testing the exact flaw location is evaluated; all features are available for demanding thickness measurements.
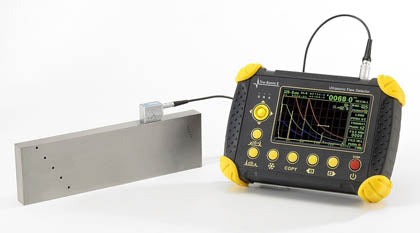
User-friendly programs for display evaluation with 3 or 4 Distance Amplitude Curves (DAC), +6dB DAC and for AVG evaluation are available as standard.
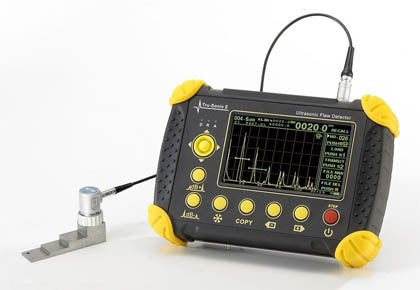
T-Scan thickness display and optional Encoder B-scan Scanner
Welding simulation map for welding section display defect location for report printing
The light weight 2.5 kg, including batteries!
The ergonomic design and operational ease will amaze you.
Large Color TFT display. A bright, 400 cd/m2 high contrast screen enables you to read your measurements data even under poor lighting conditions. The A-Scan, the instrument settings and the digital measurement readings are all displayed simultaneously.
The instruments can withstand the toughest condition. After testing, you will certainly wish to use the many documentation possibilities to record all calibration parameters and test results. It could storage 500 data inside.
The high refresh rate (60Hz) of the bright and high-contrast TFT screen is reminiscent of the successful analog tubes.
You can read your measurement readings quickly and clearly. If a measurement is made when you are at some distance from your instrument, simply display the reading in large digits.
The pulse repetition frequency can be reduced. By doing this, phantom echoes can be reliable avoided which could occur when testing larger test objects.
The instrument can store data sets, including all instrument parameters, test results and A-Scans and can be recalled at any time.
You soon feel at ease, because you operate them in accordance with your proven standards for digital instruments.
FEATURES
|
Joystick control set and adjust all parameters
Welding simulation map
Large thickness reading display
DAC curve with DAC alarm
Curve DGS ( optional)
Positive, negative, and minimum depth alarms
Filled waveform trace display
Separately Gate A and Gate B setting with alarm
|
Peak or Flank measurement
Freeze and Peak memory mode
Automatic calibration on two points
Pulse repetition frequency control
Displays sound path value, surface distance and depth to flaw
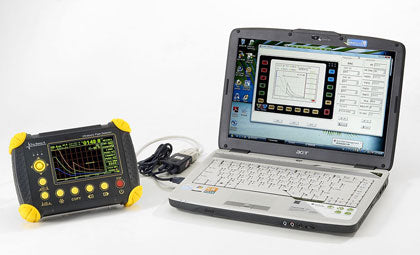
in angle beam inspections Connects to PC via USB cable to download data and make
certificates |
TECHNICAL SPECIFICATIONS
|
|
Calibration range:
|
From 25 to 1000 mm (steel long)
|
|
Sound velocity:
|
2 fixed values(3230m/s,5920m/s) and adjustable in the range 1000 to 9999m/s in steps of 1m/s
|
|
|
Probe delay:
|
0 to 2000 mm
|
|
|
Gain:
|
100dB, adjustable in steps of 0.1/2/6/12/20 dB
|
|
|
Fine Gain:
|
0.1 dB
|
|
|
Frequency range:
|
0.5-10 MHz wide band
|
|
|
Pulse repetition frequency:
|
10-1000Hz, depending on the set calibration range and the probe delay for adjustable
|
|
|
Test methods:
|
Pulse echo mode and Thru mode
|
|
|
Pulse Voltage:
|
300 V negative spike
|
|
|
Damping:
|
120 ohm
|
|
|
Echo presentation:
|
Full wave
|
|
|
Suppression:
|
Linear, 0 to 90% screen height adjustable in steps of 1%, status indication on the display
|
|
|
DAC:
|
Recording of up to 8 reference echoes, 40dB dynamic range,
display of the DAC curve 3 or 4 DAC curve can be setting
|
|
|
DGS:
|
Measurement technique that allows defects echoes through the evaluation of diagrams DGS associated with particolar probes and materials.
|
|
|
Data storage:
|
500 A-scan Trace Data sets in the FLASH memory, with additional alphanumeric identification and directory function
|
|
|
Units of measure:
|
mm or inch
|
|
|
Interface:
|
USB
|
|
|
|
|
|
|
Probe connector:
|
Two LEMO 1 connectors or BNC Connector
|
|
|
Power supply:
|
Removable 13.2Ah/ 3.7 V Li-ion Battery or mains supply via an
external mains power/charger unit JBD15-A2S
|
|
|
Operational period:
|
Up to 6 hours with Battery ( select LCD low bright )
|
|
|
Operating temperature:
|
-5° C +65° C
|
|
|
Storage temperature:
|
-40° C +75° C (without batteries)
|
|
|
Display size:
|
110mm × 62mm (W×H)
|
|
|
Dimensions:
|
145mm × 210mm ×4 5mm (H×W×T)
|
This item is by order only
Share
